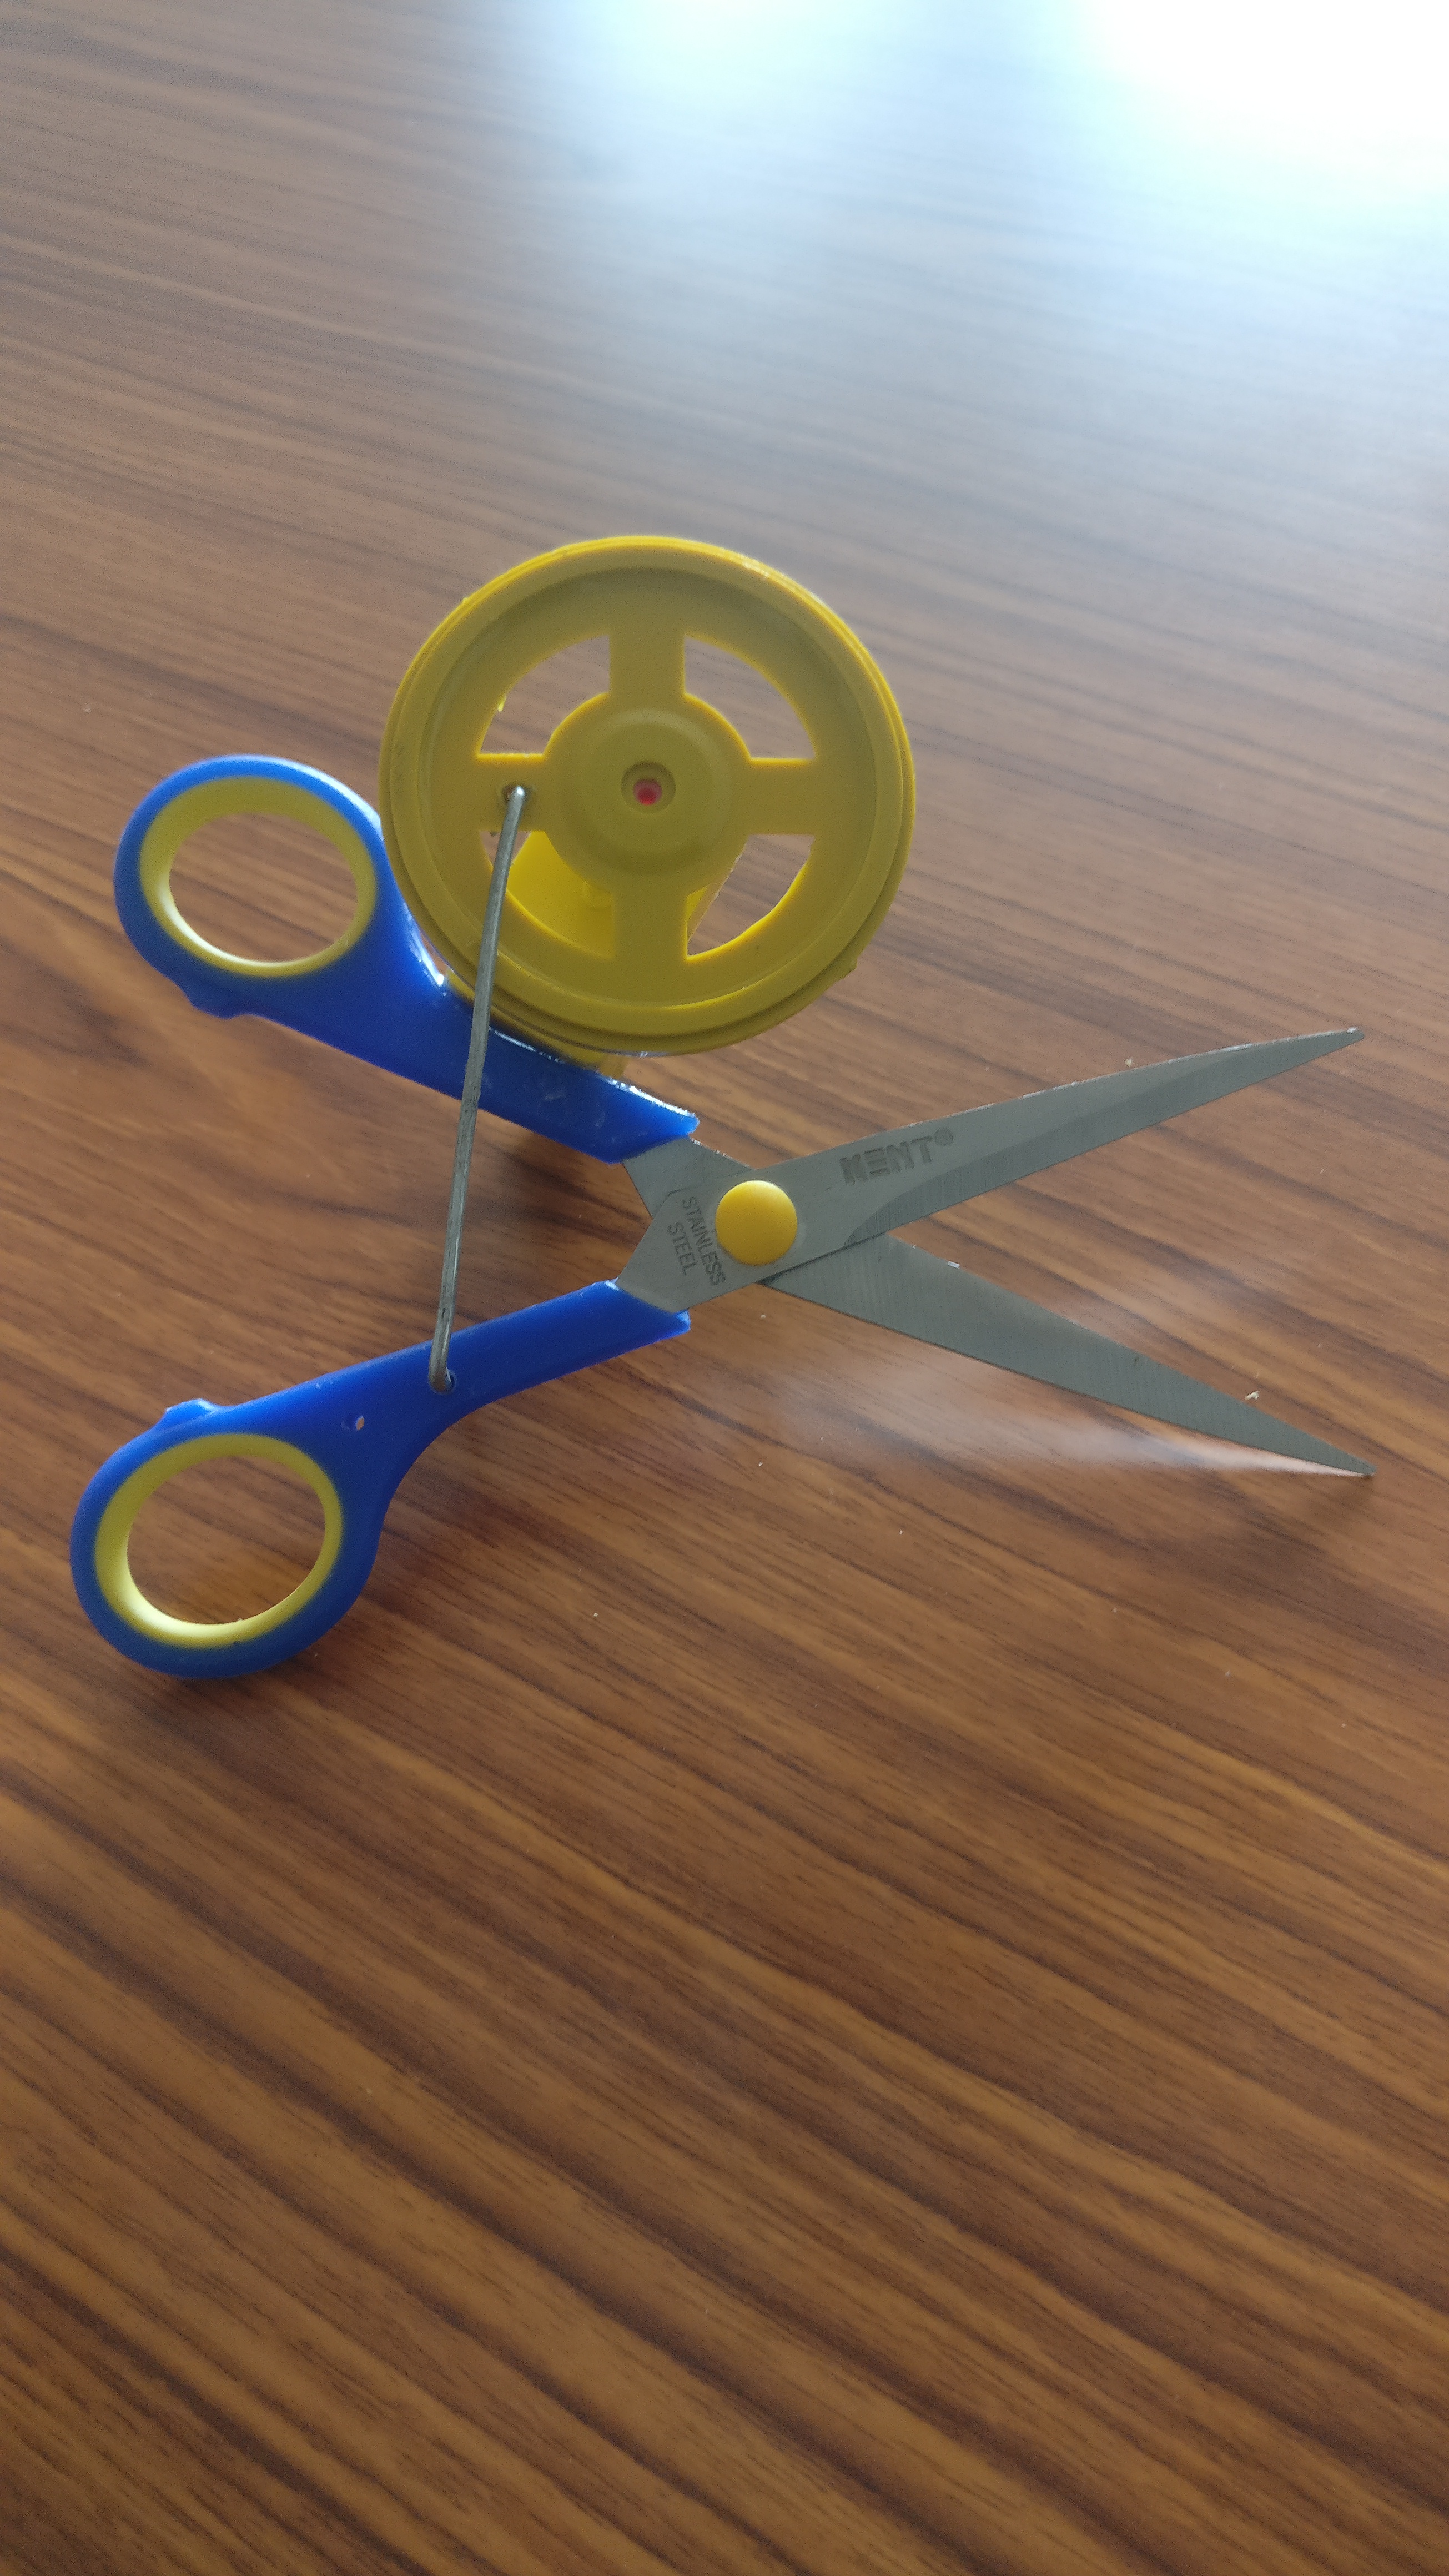
What about if we can operate scissor using a motor and battery? Cool, Isn't it. Here I will share a simple way to build motorized scissors. But why this motorized scissors? That's a good question. For me, this was an essential requirement to Automate Ribbon Cutting process of Inauguration of our maker-space. One of my acquaintance come with this idea to automate ribbon cutting, and then I agreed to give a try. Watch the working video given below and you will get a better idea about motorized scissors.
Working Video


Components
- BO Motor with Wheel (http://amzn.in/fm9uD1i)
- Scissors
- Strong bond glue - Araldite, Super Glue etc
- Strong thing iron road
- 9v battery
How to Build - Steps
Arrange the components listed above.
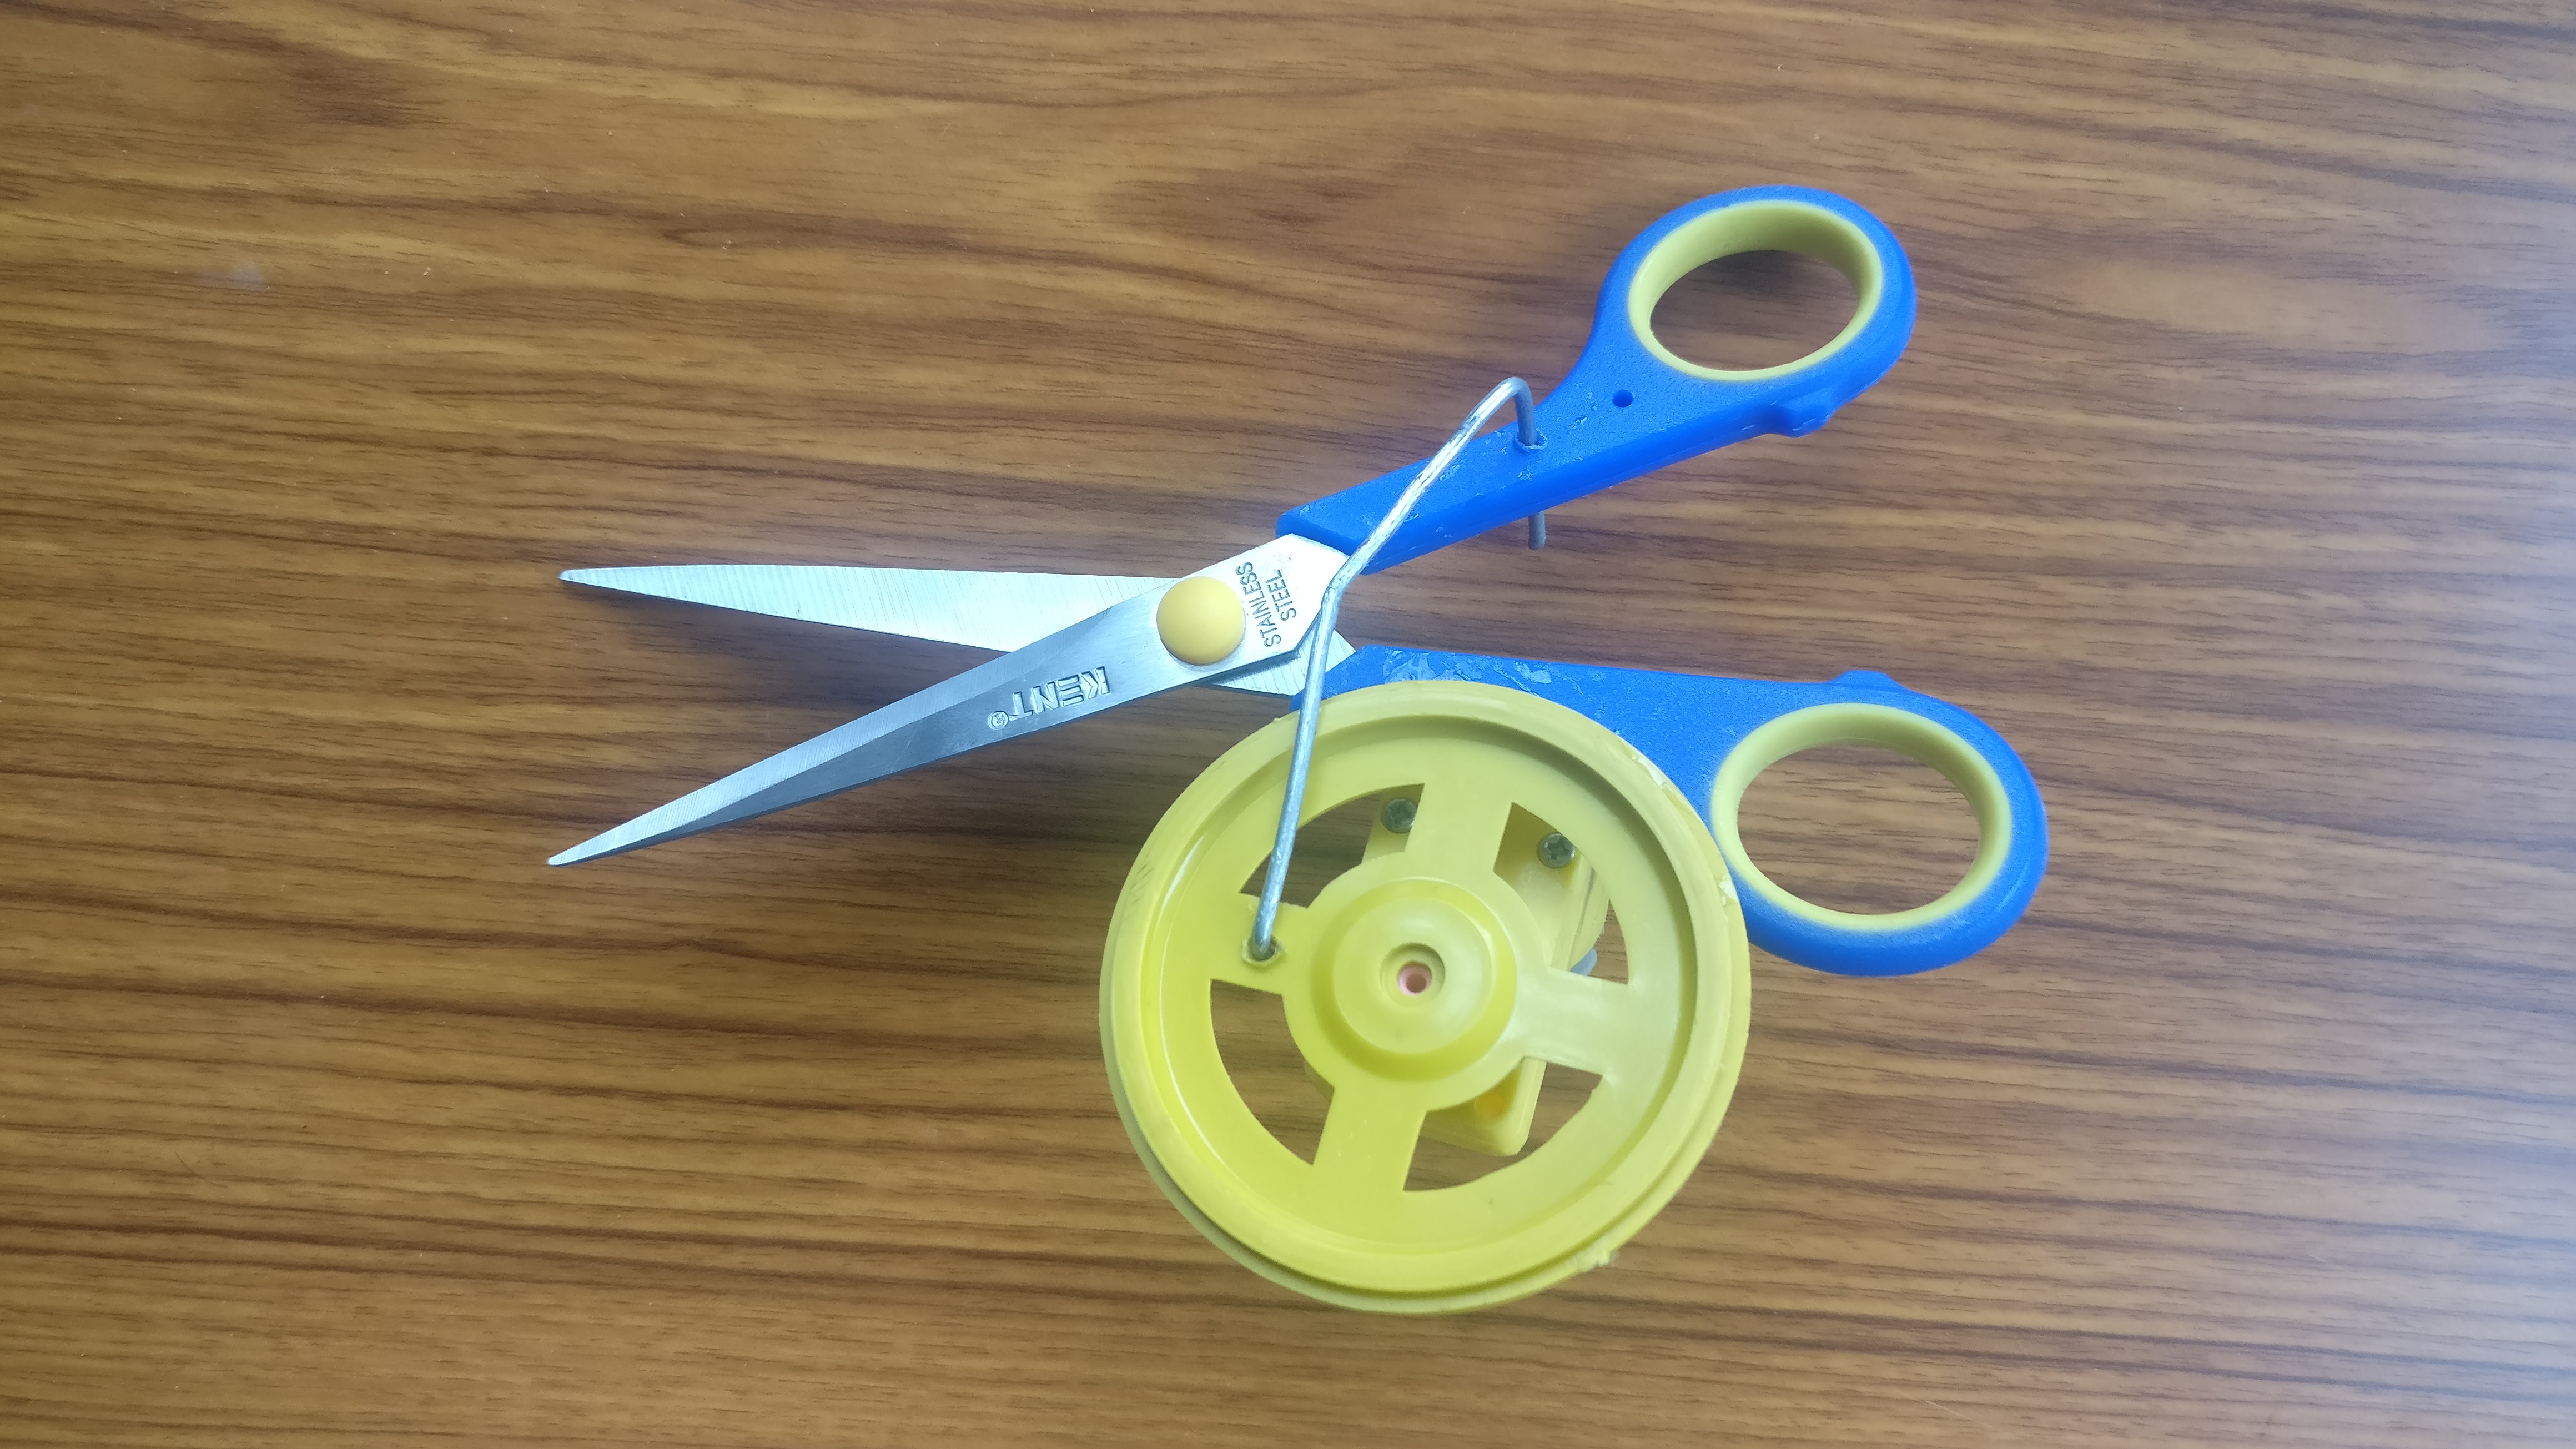
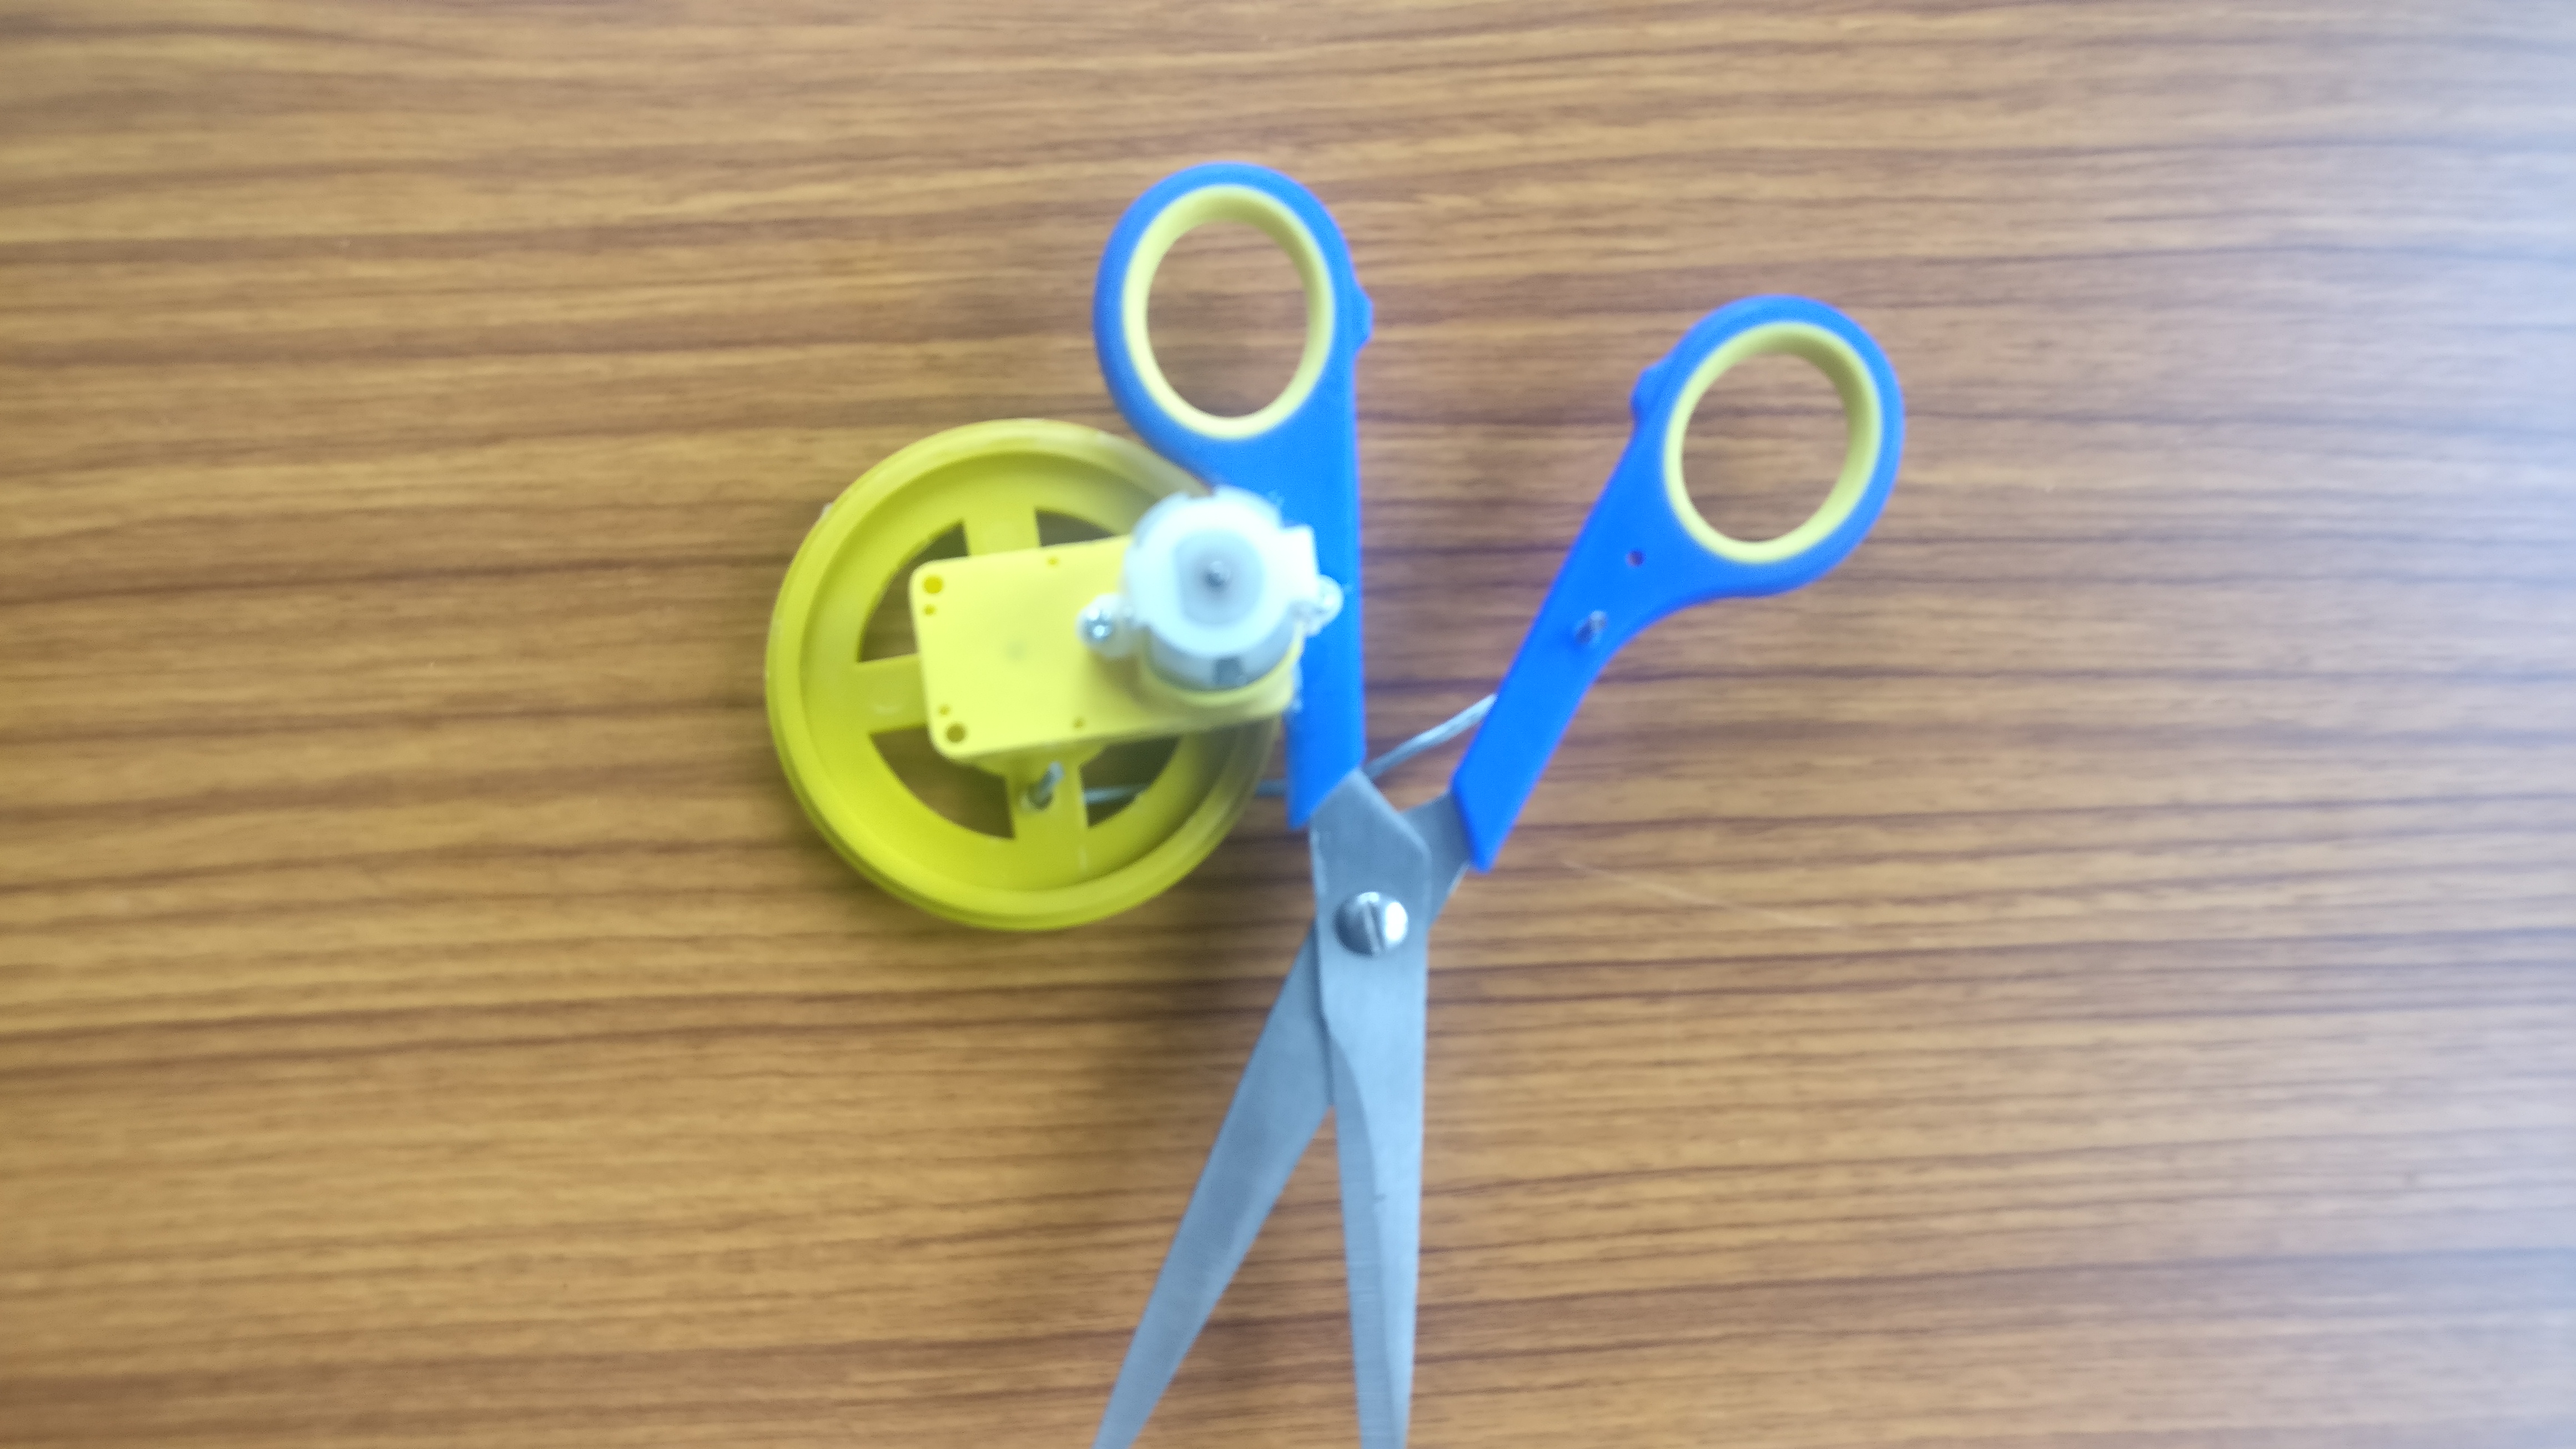
- Make a small hole in the plastic handle of scissors and in the wheel body as shown in the images using Drilling machine. Here I used 2mm drill bit. Choose a drill bit that suits the diameter of your iron road.
- Fix one handle of scissors on top of BO motor as shown in pictures using a strong adhesive like Super Glue or Araldite.
- Take the iron road and bend both sides 90 degrees and connect the Schorrs handle and wheel. Then try to rotate the wheel gently. If the scissor handle is moving with it, you are done. Sometimes the length of the iron road is little longer so that the teeth of scissor will not come close. In that situation, what you have to do is bend the iron road a little to adjust its effective length (See the 2nd and 3rd pictures).
- Now you are all set to fly. Connect a 9v battery to the motor and you will have a motorized scissor with you. You can use this to cut papers, cloths or other materials which is suitable for the used scissors. As part of the user experience, you can connect a switch between the positive side of battery and motor, so that you can operate the scissors easily.
A BO Motor is a DC motor with gear setup and operated by battery. The gear setup is to increase the torque of the motor. These type of motors are mainly used in DIY robot vehicles. BO motors are available in different specifications.
Learnings
- How to use Araldite Adhesive. Previously I have used Araldite for bonding, but I misunderstood it as a weak adhesive. Becuase Araldite takes time to make a strong between materials. But I expected a strong bond using this in a shorter time. After watching a video on how to use Araldite, I understood that it requires some time to settle the bond.
TBC...